Setup Workbench
When it comes to race cars, the vast amount of available settings when developing a setup for a specific track and the personal driving style can be overwhelming - and this not only for the beginners. Most of us know some thump rules, for example: "Increase the rear wing angle to increase the rear stabiliity in fast corners and under heavy braking". But only a few of us know all the little tricks to create the best possible compromise for a given driver / car / track combination. And it will always be a compromise, since many requirements are contradictory. Creating loads of downforce for fast corners makes you slow on the straights, right?
Welcome to "Setup Workbench", a new member in the growing collection of tools of the Simulator Controller suite.
Important: "Setup Workbench" displays various graphs using the Google chart library in an embedded web browser. This web browser, which is part of Windows, must be configured for a given application using a setting in the Windows Registry. In most cases, this setting can be configured automatically by the given application, but in rare cases, admin privileges are required to insert the corresponding key in the registry. If you encounter an error, that the Google library can not be loaded, you must run "Setup Workbench" once using administrator privileges.
Before we dive into the workflow of the "Setup Workbench", let's have a look at the settings, which are available with the button on the upper right corner of the main window.

You can identify a special folder in the first field. The "Setup Workbench" will create a file in this folder for each session where all actions you take will be noted in the form of a diary. The following entries will be made:
- Each selection of simulator, car and/or track
- Every change to the issues in the Characteristics pane of the main window
- Loading a setup
- Saving a setup incl. information about the changed setup settings
- All actions taken by the AI-based Setup Engineer
- Information about each driven lap (lap time, sector times, ...), if the telemetry system is running
By the way, this diary can be opened with a click of the button with the small book icon directly beside the settings button. You may make notes in this file as well, but make sure to save them, before you go back to the "Setup Workbench", otherwise new entries may be lost.
Good to know: If you do not configure a diary folder, the diary will be written to the Simulator Controller\Temp\Setup Workbench\Diary folder in your user Documents folder. But as the path suggests, it may be lost, once the Temp folder is cleaned up.
In the lower area, you can configure a GPT service provider if you want to use the AI-based Setup Engineer. This part is optional and is described in detail further down below.
The real world approach, when developing a setup for a race car, is to drive a few laps and make mental notes of all the flaws and drawbacks of the current car handling. You then describe all these issues to your suspension engineer, who then adjusts the settings on the car accordingly. Another test on the track will hopefully confirm the improvements that have been made, but usually also reveal new issues that arise as a result of the changes. After you have gone through this cycle a few times, you usually have found the best possible compromise for the current track.
"Setup Workbench" supports exactly this approach by allowing you to describe the issues with the current setup on the left-hand side of the window. You can determine how badly the issue affects the driving characteristics and how important an improvement is for the overall performance.

After starting the tool, you first select the simulation and, if necessary, the car and track, as well as the weather conditions for which a setup is to be developed. Different simulators and also different cars might support different sets of setup options. You can choose "Generic" or "All", if the specific simulator and car is not availabe. Then you can click on the "Problem..." button to select an issue for which you want to explore a possible change to the car setup. With the sliders "Importance" and "Severity" you determine the above-mentioned weighting and the severity of the issue. After a few moments, one or more recommendations for useful changes to the setup will appear on the right side of the window. For many issues, tiered recommendations are available based on the selected severity level.
Please note, that it is possible to describe and edit several issues at once. "Setup Workbench" will try to find the best possible compromise, especially when there are conflicting requirements. Of course, this has its limitations and it is therefore always advisable to tackle one or two issues at a time, even if "Setup Workbench" searches for solutions for up to eight issues at a time.
Using the "Load..." and "Save..." buttons in the lower left corner of the window, you can store and retrieve your current selection of issues to your hard drive. The current state will also be stored, when you hold down the Control key, while exiting "Setup Workbench". This state can be retrieved again, when you hold down the Control key, while starting "Setup Workbench". Last, but not least, when you load a set of saved issues, you suppress the deletion of all present issues by holding down the Control key as well. But be aware, that there is a restriction for the overall number of issues.
Important: If you are new to car racing or in general feel not comfortable to describe your handling issues, several other and to some extent automatic ways to detect and work on handling issues are available. These are described further down below.
"Setup Workbench" provides a special tool, which analyzes the telemetry data while you are driving to detect over- or understeering corner by corner. Handling issues can then be autmatically generated from this information. To start the analyzer, choose the "Analyzer..." item from the "Problem..." menu. The following window appears:

In this dialog you can initialize the analyzer for your car and your targeted driving style.
Let's start withe first tab "Handling":
-
It is absolutely crucial, that the steering lock and steering ratio information is correct, since a calculated combination of these values together with the angular velocity are used to detect over- or understeer in a corner.
If you don't know the steering lock of your car, you can activate the steering wheel on screen, count full and fractional rotation from full left to full right and multiply this by 360. So, if have two and a half rounds from left to right, the steering lock is 900. The steering ratio on the other hand determines the amount of truning of your front wheels, when you turn your steering wheels. Higher number means less turning, so a lower number creates a more direct steering. It is equally important, that this number is correct, or the analayzer will report a lot of understeer events, that are simply not there. A typical number for the steering ratio of GT cars is 12, for open wheelers or even carts, the number is much smaller.
In Assetto Corsa Competizione, the value for "Steering Lock" is taken from the meta data of a given car, and the value for "Steering Ratio" must be that that has been set in the currently chosen setup. For RaceRoom Racing Experience these values are fixed and will be taken directly from the simulator. For all other simulators and their cars, correspondind information or calculation rules can be found on the internet in most cases or you can derive them as described above.
For Le Mans Ultimate and rFactor 2 the values for "Steering Lock" and "Steering Ratio" are also taken from the meta data. These values are the defaults used in a fresh setup created by the simulator. If you have chosen different values, if that is possible at all for the current car, use thse values.
Good to know: What the calculation really needs is the range in degrees how much the steering wheels can turn from full left to full right. This range is calculated by
Steering Range = Steering Lock / Steering Ratio
Therefore, if you have this value and not the other ones, you can derive them by using the above simple relationship. For example, it can be found in the extended setup screen of Automobilista 2.
-
The second line of entry fields allow you to enter the wheel base and the track width of the car you want to analyze. Although the underlying computation using the Ackermann steering equations require those values to get a precise result, it will be absolutely okay to use the defaults of 270 cm wheelbase and 150 cm track width for GT-like cars. You might not get the exact slip angles, but you can compensate for that using the threshold sliders anyway.
-
Since the "Setup Workbench" differentiates between slow and fast corners, you can enter the speed which splits the two categories in the next field.
-
Last but not least, you can define thresholds for the detection of low, medium and high over- or understeering. The thresholds are also very specific for a given simulator and a given car and also for your preferred driving style. Therefore you have to experiment a little bit to find the best settings here. But some general rules apply:
- If you prefer a more loose rear, move the top three sliders a little bit to the left.
- If you prefer a safe and stable, move all sliders a little bit to the center.
- If you don't like understeering, move the corresponding sliders to the left.
- And so on...
As said, you must experiment with the positions of the thresholds, until the analyzer will reflect your desired driving style and will only collect those over- and understeer issues, which you want to report. If you want the analyzer to detect those values for you, you can use a special calibration mode. If you click on "Calibrate..." you will be aksed to first drive a couple of laps as clean as possible (without over- or understeering the car) and then drive as dirty as possible, but without loosing control and going off-track. The analyzer will then use the collected data to come up with some decent settings for the thresholds to work with. Whatever way you choose, the position of the sliders and all other values will be remembered for each simulator, car and possibly track combination, so you have to go through this process only once.
A special case while detecting over- and understeer is the situation, when you already have lost the rear and try to catch the car using counter steering. This will always count as heavy oversteer. It is detected, when the steering angle (in radians) has a different sign than the angular velocity (in radians / second) of the car rotation around the Z axis.
Technical: The sliders indicate from which value a deviation of the ideal yaw angle is considered light, medium or heavy. If there is no glide angle at all, this value is 0. In the case of oversteer, the value is negative (the larger, the more drift angle) and in the case of understeer, the value is positive, the larger, the more understeer. If the wheelbase and the track width has been set exactly as known to the simulator, the values used here are ten times that of the slip angle (aka deviation of the ideal yaw angle). Therefore an oversteer angle by 3 degrees will have a value of -30.
-
Finally, you can enable a short feedback sound, which varies in frequency and volume depending on over-/understeer events and their intensity. Lower tones indicate oversteering while higher tones indicate understeering.
Good to know: Handling issues can also be analyzed, when loading a pre-recorded telemetry file into the issue analyzer. But due to differences in sample rates, the frequency of the reported issues may be slightly different.
The second tab "Suspension" let you tweak the bottom out detection for the specific car and track.

In general, it is not possible to detect a bootom out event directly with the data supplied by the APIs of most simulators. Therefore, a mathematical method based on the used suspension travel data is used instead:
- Collect the suspension deflection (the current travel into the suspension) for each wheel with a high sample rate.
- Compute the movement speed and the first derivative, the acceleration of the suspension piston.
- Smooth out the data and collect events, where the negative acceleration is above a given threshold, and which met certain criterias for event length and distance between them.
- Calculate the impulse, which is equivalent to the energy submitted into the frame.
- Classify the events into light, medium and heavy.
In the upper group of fields, you can specifiy the acceleration thresholds for the different severity levels of a bottom out event. But only events with the specified minimum length will be considered and all events that are closer together than the specified gap will be combined into one event.
When preparing settings for a given simulator always start with the severity thresholds. The derived acceleration is very sensitive to timing and therefore depends on the data sample rate of the simulator. Especially iRacing has a low data rate compared to the other simulators and therefore may need much lower settings for the thresholds.
The settings in the lower group can be used to fine-tune the detection. Especially the Deflection and Acceleration windows can have a big influence. Smaller values will increase the sensitivity of the detection, but will also increease the possibility for false positives - and the other way around. However, changing these values is usually unnecessary and should therefore really be the very last approach.
Suspension analysis may not be available for all simulators, depending on the data and the resolution supplied by the API. At the time of this writing, Project Motor Racing is definitely not supported.
As you can see, it can need some time to find good settings for a given car. The track does not play a role here and also the suspension settings in the setup do not play a role, cause the detection is based on acceleration and not on absolute suspension travel. So you can reuse the settings (as well as all other settings of the issue analyzer), once you have dialed them in.
Good to know: Suspension issues can also be analyzed, when loading a pre-recorded telemetry file into the issue analyzer. But due to differences in sample rates, the severity and frequency of the detected issues may be slightly different compared to a real-time analysis.
On the third tab "Temperatures" you can specify several thresholds for tyre, brake and engine temepratures:

The Ideal temperatures are the values you want to target in average over the course of a complete lap. Going over "Max" or going under "Min" will increase the severity of any created temperature related issues. And, last but not least, when the difference between inner and outer tyre temperatures of a given tyre exceeds the given "Max OI Difference" value, a corresponding issue will be generated as well.
Good to know: Temperature analysis is not available, when loading a pre-recorded telemetry file.
It is recommended to choose a car before entering the analyzer mode, since then some of the settings for the issue analyzer will be initialized with car specific data, depending on the chosen simulator. Also, all settings you have chosen will be saved for the selected car / track combination and will be re-used the next time you will use the analyzer.
Good to know: If you change a setting while track is set to "All", this setting will be used as a default for all tracks, for which no settings have been selected so far. You can even use the issue analyzer for "All" cars and the selected settings will be used as defaults as well. This may or may not be useful. You have been warned.
Once you have dialed your settings, you can click on "Start".

Go to the track and drive a couple of laps. Always the last 2 laps will be considered for handling issues by the analyzer, therefore you can "Stop" the recording, when you have run two consecutive decent laps, if you are only interested in handling. Other issues, especially those related to temperatures, will start collecting after a warmup period, typically after 180 seconds. Therefore, if you are interested in those issues, drive a couple of more laps with a fully warmed up car.
The analyzer will show you, which issues it detected, have been detected.

For each individual issue category, for example low speed corner entry understeering, the "Frequency" shows how often this happens related to the overall track length and the "Intensity" shows the category (Light, Medium or Heavy) according to your initial settings. You can use the intensity drop down and also the threshold slider here to filter unimportant issues, which you don't want to be considered. Moving the slider to the right will remove all issues, whose frequency percentage is below the set threshold. If you want to include all issues, set the slider completely to the left. You can additionally remove those issues, which resulted from a driver error, by unchecking the check box in the issue list, before proceeding.
When you are satiesfied with the displayed issues, click on "Apply". The analyzer will clear all current issues from the left pane of the "Setup Workbench" and will create new ones for the recorded issues. Please note, that all issues for a given category, for example "Understeer on low speed corner entry", will be combined into one issue in the problem list.
Please be aware that not every handling issue is related to problems with the car setup. Equally often they arise when you are not used to specific characteristics of the car and you are kind of overdriving it. The analyzer can help you here as well. Try to drive clean laps as without too much detected over- or understeering events. You will see, that this will feel slower most of the time, but in the end you will be faster.
Final note: I would like to take the opportunity to thank the user "WallyM" of the Assetto Corsa Competizione forum, who provided parts of the algorithms used in the handling part of the analyzer.
Instead of analyzing telemetry data live while on the track, you can also analyze data from a recent session as long as the telemetry files are still available, because they either have been saved to the session database or they are still available in the Simulator Controller\Temp\Sessions folder in your user Documents folder, if you have used the "Solo Center" or the "Team Center". When recording the telemetry with the "Setup Workbench" itself, telemetry data will have been stored in Simulator Controller\Temp\Setup Workbench\Telemetry folder in your user Documents folder. To analyze telemetry data, click on "Telemetry..." on the first page instead of clicking on "Start". Then locate and load the telemetry file(s) you want to use using the file browser and inspect the detected issues, which will have been generated based on the telemetry data.
The analyzer acquires telemetry data from the different simulation games using so called telemetry providers, which in most cases read the required data from a shared memory interface. In general these are already included in Simulator Controller and there is nothing to do, but for Assetto Corsa, rFactor 2 and Le Mans Ultimate, you need to install and activate a plugin into a special location for the telemetry interface to work and for Automobilista 2 and Project CARS 2 a change in the settings is necessary.
Please, note that all of this also applies to the AI Race Assistants, but you have to do it only once, of course.
-
Assetto Corsa
Please copy the complete SimlatorController folder, which is located in the Utilities\Plugins folder of the Simulator Controller installation, to the Steam installation folder of Assetto Corsa and there into the apps\python folder. You will have to enable this plugin in the Asseto Corsa settings afterwards. This plugin uses code originally developed by Sparten which can be found at GitHub.
-
rFactor 2 and Le Mans Ultimate
You can find the plugin rFactor2SharedMemoryMapPlugin64.dll in Utilities\Plugins folder the Simulator Controller installation or you can load the latest version from GitHub.
rFactor 2: Copy the DLL file to the Bin64\Plugins folder in the Steam installation directory of rFactor 2. You will have to enable this plugin in the rFactor 2 settings afterwards.
Le Mans Ultimate: Copy the DLL to the Plugins folder in the Steam installation directory of Le Mans Ultimate. As the time of this writing, there is no way to enable the plugin in the UI of le Mans Ultimate. Therefore start the game once, go to the track and drive out the pit. Exit the game and open the file UserData\player\CustomPluginVariables.JSON with a text editor and set " Enabled:" to 1.
-
Automobilista 2 and Project CARS 2
You have to enable Shared Memory access in the game settings. Please use the PCars 2 mode.
-
Project Motor Racing
You have to enable the UDP access in the settings. The first time any application of Simulator Controller will access the API, the Windows Firewall will ask for permission. Best to do this while running a local session.
-
F1 25
The UDP configuration must allow for UDP packets to reach any system on the network (aka broadcast mode). Unfortunately, Simulator Controller cannot be used on the same machine as F1 25 at the time of this writing, because it is flagged by Javelin as cheating software. However, there are solutions to this problem. See the special notes for F1 25 for more information.
If you have used the quick setup method of "Simulator Setup", the plugins may already have been installed, but activation is a manual step.
Another valuable tool to improve your lap times is the integrated Telemetry Viewer, which can be opened and activated by choosing the "Telemetry..." command from the "Session" menu.

As long as the Telemetry Viewer is open, car telemetry data will be collected lap by lap in the background while you are driving. You can use the browser to load the telemetry for a given lap and you can choose a reference lap for comparison.
Good to know: The telemetry data is stored lap by lap in the Simulator Controller\Temp\Setup Workbench\Telemetry folder which is located in your user Documents folder. When you import laps from the session database, they will be stored in Simulator Controller\Temp\Setup Workbench\Telemetry\Imported.
When looking for areas of improvement take a close look to your application of throttle and brakes and the activation of TC and ABS. Trailing off the brakes and the transition back to full throttle is the most important skill to master for fast lap times. This does not mean, that sometimes coasting around a corner is not necessary. Use the Telemetry Viewer to compare your laps with the fastest lap of a given session and learn what exactly made you faster there.
In addition to the functionality which is available in all applications that use the Telemetry Viewer, a very important additional function is available, when telemetry is recorded while working with the "Setup Workbench". If you click on the big button with the suspension icon, a special inspector for the damper system of the car appears.

The graph on the first tab can show you the suspension velocity histogram either for the whole lap or for a section of the track specified by the currently selected position in the telemetry graph or on the track map. Depending on the car and the track, you may want to change velocity threshold where the damper knee is located between low speed and high speed damping.
The target is always a Gauss curve, with the compression in the positive value range and with rebound showing negative suspension movement velocity, with over 50% of the suspension movement in the low speed damping area. If that is not a case in your specific setup, apply more or less damping accordingly.
If you want to go more into the details, use the graphs on the second tab. There you can create specialized reports for the suspension movement, also for either the whole lap or a selected part of the track.

Specialized graphs for suspension movement (deflection), velocity, acceleration and also the distribution of highspeed vs. lowspeed dampening are available and you can focus on any wheel, if required. Very useful is the fuunction to zoom in on the currently selected track position in the main telemetry window.
The Telemetry Viewer supports two different sources for telemetry data. One, which is the default, is integrated into Simulator Controller and will provide telemetry data after a learning phase of two to three laps. The other one uses a connection to "Second Monitor", a tool developed by @winzarten. You can choose, which telemetry provider to use by clicking on the button with the "Connect" icon in the upper right corner of the Telemetry Viewer window. If you choose "Second Monitor" here, make sure that this application is running while you are out on the track.
- Depending on the telemetry provider it can take a few laps before the first telemetry data gets recorded.
- The internal telemetry provider uses a special method for Assetto Corsa Competizione, which unfortunately does not supply the distance of the car into the track in the shared memory API (it is available in the UDP interface, though, but this interface does not provide telemetry data). Because of that, the track layout must be learned, before telemetry data can be correlated to the track position. Be sure to drive clean during the first laps.
- The telemetry recorder is only running, while the Telemetry Viewer is open. Therefore, you can restart the learning process for Assetto Corsa Competizione, if necessary, by closing the window and re-open it.
- The currently selected lap can be deleted by using the "-" button to the right of the drop down menu of all laps. If you hold down the Control key, all laps can be deleted at once.
- You can save and load telemetry data for a given lap for later usage:
- Typically used for reference laps, even from other drivers.
- Use the small button with the "Disc" icon to save a telemetry lap to the session database or any other location.
- Use the small button with the "Folder" icon to load a telemetry lap from the session database or any other location.
- Telemetry data, which has been imported this way will not become part of the current session. Imported telemetry data can be removed by using the delete button. This will not remove it from its original location.
Good to know: If you use the "Open..." button in the dialog, which let's you browse the available telemetry data, you can import telemetry data from "Second Monitor", as long as it has been saved as JSON file, which can be activated in the settings of "Second Monitor".
The fourth tool available to detect and mitigate car setup issues is the so-called Setup Engineer, which is using GPT technology to analyze your telemetry data and derive a very detaild performance and handling analysis. Before you can use the Setup Engineer, you must configure a GPT service provider in the settings, which can be openend by clicking on the settings button in the upper right corner of the main window of "Setup Workbench". Here cou can choose a GPT service provider and a suitable LLM for the Setup Engineer. The choices are similar to the GPT configuration of the Driving Coach. See here for more information about the supported GPT service providers.
Please note that a high end LLM is required for the Setup Engineer. It must be capable to work with huge amounts of nuerical data, must be able to do thousands of numerical calculations and must be able to follow several related goals at the same time. At the time of this writing, only models in the category of OpenAIs GPT 5.4 (not mini or nano) and beyond show good results. Of course, using models of this category is not cheap - one run of the Setup Engineer with GPT 5.4 costs around 20-30 cent.
And also similar to the Driving Coach, you can modify the special instructions send to the LLM together with the telemetry data. However, the default instructions are well-balanced, so a modification is normally not ncessary.
Below you find all instruction categories and the supported variables:
| Instruction | What | Description |
|---|---|---|
| Character | Scope | This instruction is used always and must define the profession and the personality of the Setup Engineer. The default instruction creates an engineer specialized in car handling and car physics. |
| Simulation | Scope | This instruction is also supplied always and identifies the chosen simulator, car and track. |
| %simulator% | The name of the used simulator. | |
| %car% | The name of the used car. | |
| %track% | The name of the used track. | |
| Geometry | Scope | If available, additional geometry information will be supplied using this instruction. Each variable will be placed on its own line and must include the label, like: "Steer Lock: 480". This makes it possible to supress (white out) missing information. The supplied geometry information may be used by the LLM to derive the slip angle using the Ackermann equations. |
| %steerLock% | Steer lock of the car. | |
| %steerRatio% | Steer lock of the car. | |
| %trackWidth% | Average track width of both axles. | |
| %wheelbase% | Wheelbase of the car. | |
| Handling | Scope | This instruction is used only when you have decided to supply the identified handling issues beside the telemetry data to the LLM. |
| %handling% | This variable is substituted with a JSON representation of the issues. | |
| Analysis | Scope | The most important instruction. It defines the goal for the LLM and supplies information about the structure of the telemetry data. Important: The telemetry data is not passed in this instruction using a variable. Rather the data is passed without any further instructions or comments in the user prompt. |
| Recommenations | Scope | Once an analysis has been created, this instruction tells the LLM how to use a supplied function/tool to apply the recommended setup changes to a loaded car setup. Important: The analysis created in the previous step is not passed in this instruction using a variable. Rather the information is passed without any further instructions or comments in the user prompt. |
If you have changed an instruction, you can revert it to the original instruction by clicking on the small button with the recycle icon. If you hold down the Control key when clicking on the button all instructions will be reverted at the same time.
The Setup Engineer works on numerical telemetry data. Therefore it is necessary to run a few laps and collect telemetry data using the integrated telemetry system (see above). You must have choosen a specific car and also a specific track before using the Setup Engineer and the recorded telemetry data must originate from this combination, of course. Otherwise the results would be more tha questionable.
Good to know: It is also possible to use laps recorded in other sessions by loading them into the telemetry viewer from the session database. Telemetry files from other locations than the session database may not be detected correctly or will lack information like the lap time.
One you have a decent lap recorded, choose "Engineer..." from the "Problems..." menu. The following window appears:

Choose the lap you want to be analyzed and also decide, if you want your currently identified issues from the Characteristics pane of the main window to be taken into account. And you can decide, how many samples of the high resolution telemetry file will be made available to the LLM. This needs a little explanation:
Depending on the provider, telemetry data will be recorded with a high sampling rate, for example 20 Hz. For a typical lap with a lap time around two minutes, this will produce over 7000 samples. Each sample consists of around 20 numerical data points. Providing all this data to a LLM will overflow the context window and may even trigger rate limits for most providers. And even if that is not the case, the number of consumed tokens will be very large and therefore the costs of the request will be high. Taken all this into account the system will the resolution telemetry data to the configured number of samples per lap. Start with the default of 1000 samples and increase only, if really needed.
Additional to the choices described above data about the car geometry will be made available to the LLM. This information, which will be taken from the settings of the issue analyzer, may be used to calculate the slip angle using the Ackermann equations, for example.
Once you have choosen your settings, click on the button with the engineer icon. It will take some time for the LLM to analyze the data. Once completed, a review based on the telemetry data and, if supplied, on the supplied issues will be presented in the lower area of the window.

The structure, content and quality of the review strongly depends on the configured LLM, so it will need several runs at the beginning until you get good results. As mentioned above, don't waste your time with small or outdated models.
Here is an example of a high quality analysis created with GPT 5.5.
If the Setup Engineer identified reasonable changes to the car setup, you can of course apply them manually. But you can also ask the Setup Engineer to do it for you. For this, you have to open a Setup Editor (exactly one) and then you click on the button with the tools in the Setup Engineer window. The LLM, which is required to handle tool calling properly, is then asked to apply its own recommendations to the setup currently loaded in the Setup Editor. But always double check the result, only the most capable LLMs will manage to do this without any errors.
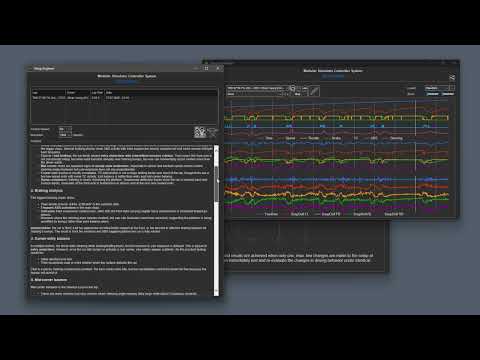
Here is a video that demonstrates the complete workflow:
Since "Setup Workbench" has no knowledge about the concrete settings in the current car setup, all recommendations are of relative nature. When you get the recommendation for a reduction of "Camber Rear Left" by -1, this does not mean that you have to reduce the rear left camber by exactly 1 click or by 0.1 degree. It rather means, that a reduction of the camber will have a large, when not the largest impact in the set of recommendations. To be precise, a recommendation with a value of 1.0 or -1.0 is four times as important than a recommendation with a value of 0.25. This is a hint for you where to start with your incremental tests when applying the recommended setup changes to your car.
Most of the recommended setup values will be self-explanatory. The table below will show you the meanung of the positive and negative values of the more special setup options.
| Setting | Negative values | Positive values |
|---|---|---|
| Brake Balance | More pressure to the rear brakes | More pressure to the front brakes |
| Brake Ducts | Less open duct | More open duct |
| Radiator Blankets | Less radiator cover / more cooling | More radiator cover / less cooling |
| Splitter / Wing | Less drag / downforce | More drag / downforce |
| Ride Height | Lower ride height | Higher ride height |
| Damper | Less damping / resistance | More damping / resistance |
| Spring / Bumpstop Rate | Softer | Stiffer |
| Bumpstop Range | Shorter | Longer |
| Differential Preload | Less opening resistance | More opening resistance |
| Anti Roll Bar | Softer | Stiffer |
| Toe (1) | Less toe out / More toe in | More toe out / Less toe in |
| Camber | Less negative camber | More negative camber |
(1) Most race cars run a little bit of toe in at the rear. The recommendations are based on that assumption. If that is not the case with your car, please reverse the recommendations.
Please be aware, that a long list of change recommendations does not mean that you have to change each and every setting. It rather means, that all these settings have an influence on the given issue. I recommend starting with the setting with the biggest impact and then work through the list step by step while monitoring the resulting change in car handling by driving a few laps after each change.
If you're working on more than one issue at a time, it's likely that you'll have conflicting recommendations to address. Depending on the "Importance" and "Severity" settings, "Setup Workbench" attempts to balance these contradictions. Example: If both a high top speed and equally high cornering speeds are required in fast corners, it depends on the product of the respective "Importance" and "Severity" whether an increase or decrease in the downforce value of the rear wing is recommended at the end.
The rules for the recommendations have been compiled from different sources, above all my own experiences. That said, I do not take responsibility for the correctness of all the recommendations, especially when generating recommendations for complex and partly contradictory multi-problem cases. If you find an error in the recommendations, please let me know. I always strive to improve the quality of my software.
"Setup Workbench" uses the same Rule Engine, that is used by the AI Race Assistants. A generic set of rules handle the overall computation and the analysis of the problem descriptions given by the driver. Each problem is identified by a descriptor, for example "Understeer.Corner.Exit.Fast" for understeering while accelerating out of fast corners. For each setup option, a descriptor exists as well, for example "Bumpstop.Range.Front.Left" for the length of the bumpstop rubber in the front left spring damper.
During the first phase, the rule engine analyses all given problems and their "Importance" and "Severity" settings. A resulting correction value is derived, while handling contradictory requirements. Then a long list of rules are evaluated that look like this:
[?Understeer.Corner.Exit.Fast.Correction != 0] =>
		(Prove: changeSetting(Electronics.TC, -0.5, ?Understeer.Corner.Exit.Fast.Correction)),
		(Prove: changeSetting(Aero.Wing.Rear, -0.5, ?Understeer.Corner.Exit.Fast.Correction)),
		(Prove: changeSetting(Aero.Wing.Front, 1, ?Understeer.Corner.Exit.Fast.Correction)),
		(Prove: changeSetting(Aero.Splitter.Front, 1, ?Understeer.Corner.Exit.Fast.Correction)),
		(Prove: changeSetting(Aero.Height.Rear, 0.5, ?Understeer.Corner.Exit.Fast.Correction)),
		(Prove: changeSetting(Aero.Height.Front, -0.5, ?Understeer.Corner.Exit.Fast.Correction)),
		(Prove: changeSetting(Differential.Preload, 0.5, ?Understeer.Corner.Exit.Fast.Correction))

{All: [?Understeer.Corner.Exit.Fast.Correction != 0], [?Understeer.Corner.Exit.Fast.Value > 50]} =>
		(Prove: changeSetting(Bumpstop.Range, [Front.Left, Front.Right], 1, ?Understeer.Corner.Exit.Fast.Correction)),
		(Prove: changeSetting(Bumpstop.Rate, [Front.Left, Front.Right], -1, ?Understeer.Corner.Exit.Fast.Correction)),
		(Prove: changeSetting(Bumpstop.Range, [Rear.Left, Rear.Right], -0.5, ?Understeer.Corner.Exit.Fast.Correction)),
		(Prove: changeSetting(Bumpstop.Rate, [Rear.Left, Rear.Right], 0.5, ?Understeer.Corner.Exit.Fast.Correction))
As you can see, these rules define the changes to be applied to the setup settings to compensate for a specific problem, fast corner exit understeer in this example. It is self-explanatory, that a lot of settings might be influenced by many applicable rules at the same time. The generic rule set of "Setup Workbench" will handle this by computing the resulting setting as the best possible compromise for all resulting changes.
A totally different story is the Setup Engineer, which will rely on the anylytical capabilities of the configured LLM. The telemetry data is supplied to the LLM in the user prompt as a large CSV table. Additional information and instructions how to use the telemetry data are supplied as system instructions to the LLM. These instructions can be modified to suite your needs.
After you have described your problems and reviewed the recommendations of "Setup Workbench", you may either change the settings directly in your simulator, or you can load the respective setup file for the given car and let "Setup Workbench" handle the modifications. To do this, click on the button with the little car on the right side of the Selection area. This will open a second window which allows you to work with setup files. If you do this for the first time, you first have to find and load the respective setup file, which will be used as the base setup for all modifications. Once you have loaded this file, the following window opens:

On the right side, you will see the simulator specific content of the setup file, in this case a setup for Assetto Corsa Competizione in a JSON format. In the list on the right, all settings known to "Setup Workbench", which are valid for the currently selected simulator and car will be listed together with their values from the currently loaded setup file. You can select a setting in this list and change its value using the "Increase" or "Decrease" button. Much more interesting is the "Apply" button below. When you click this button, all recommendations of the "Setup Workbench" will be applied as balanced changes to the currently loaded setup. You can specify with the small slider to the right of the button the amount of the applied changes, thereby filtering small and possibly unneccessary changes. You will then see a list like this:

Using the checkboxes on the left side of each setting, you can control which modifications will be included in the modified setup and which are not. The changes will also be reflected in the internal format at the right, but this is more for documentary purposes. Once you have reviewed, chosen and possibly corrected some of the modifications, you can press the "Save..." button to save everything to a new setup file. Or you can use the "Reset" button to start over again.
Note: The Setup Editor is currently only available for Assetto Corsa, Assetto Corsa Competizione and Le Mans Ultimate. More simulators might be supported with future releases. Please see the notes section down below.
Beside applying selected recommendations for handling problems to a given setup, "Setup Workbench" is also able to compare two given setups and can also merge setups, for example a setup for dry conditions with a setup for wet conditions to create some kind of hybrid setup for endurance races. To do this, first load one setup into the Setup Editor as described above, and then click the "Compare..." button. You will be asked to load a second setup, which then will be compared to the first one. The differences will be shown in the following window.

The orginal setup will be named "Setup A" and the second will be named "Setup B" here. Beside only investigating the differences betweeen the two setups, you can also create a merged setup, name "Setup A/B". Use the slider in the lower middle of the window, to balance the weight of the two orginal setups for the settings in the merged setup. You can also use the two "Decrease" and "Increase" buttons, to change individual settings in the "Setup A/B".
When you want the merged setup to be taken over to the Setup Editor, when you are finished, click on the "Apply" button, otherwise close the window using the "Close" button.
As you might have noticed, the "Setup Workbench" implements a quite generic, but also to a large extent general approach to car handling problems. But it is also possible to introduce simulator specific or even car specific rules for the AI processing and you can also describe the car specific settings, their ranges and rules for reading and modifying setup files. All builtin definitions and rules can be found in the Resources\Garage\Definitions and in the Resources\Garage\Rules folder in the program directory. But you can introduce their own versions of these files or even new ones in the Simulator Controller\Garage folder in your user Documents folder. You can use the definition and rule files which are located in the programm directory as a template when creating your own files.
Although it is possible to introduce support for a completely new simulator, much more common is the addition of a new car. Every simulator will support a so called generic car, with all setup settings supported by this simulator. Also, the Setup Editor will handle this generic car, but almost all settings will be handled as simple "clicks" without restricting the changes to a known range. This information is provided by the so called car definition files and the car specific rules.
General car meta data is managed in the files "Car Data.ini" and "Tyre Data.ini" which can be found in Resources\Simulator Data\[Simulator] in the program folder (with [Simulator] substituted with "AC" or "ACC" and so on). If your specific car is not already available, you can create an entry for your own car by placing corresponding files in the Simulator Controller\Simulator Data\[Simulator] folder which resides in your user Documents folder. Use one of the already available cars as a template for your own entries. The following sections are supported:
-
[Car Names]
Mapping from internal car name to official car name. Example:
ks_alfa_33_stradale=Alfa Romeo 33 Stradale -
[Car Codes]
Mapping from official car name to internal car name. Example:
Alfa Romeo 33 Stradale=ks_alfa_33_stradale -
[Car Classes]
Mapping from internal car name to corresponding car class. Example:
ks_alfa_33_stradale=Road -
[Car Information]
Geometry and other data for a given car. Example:
 mclaren_720s_gt3.SteerLock=480
 mclaren_720s_gt3.SteerRatio=12
 mclaren_720s_gt3.WheelBase=270
 mclaren_720s_gt3.TrackWidth=150
Depending on the simulator, some or all of this information is not required, because it is provided by the corresponding API. Additionally, the values from the "[Car Information]" section can also be supplied in the setup definition files for a given car in the "[General]" section (see below).
Please note, that the "Car Data.ini" file for Assetto Corsa Competizione has a different format, but because no cars can be added for this simulator by the community, it does not matter.
Once the car is generally known to Simulator Controller, proceed to the next section.
Each simulator comes with a set settings which will be available for all cars. A specific car might restrict or change this set by using a car specific rule file. Let's start with a simple example:
[?Initialize] => (Prove: removeSetting("Assetto Corsa Competizione", "McLaren 720s GT3", Aero.Splitter.Front))
This rule removes the front splitter setting from the set of available settings in Assetto Corsa Competizione for the "McLaren 720s GT3" upon initialization of the rule set, since this car does not have an adjustable front splitter.
It is also possible to change the set of settings available to the "Setup Workbench" in general, which can also be used to remove a specific setting, but especially must be used to introduce new, car specific settings. This is described below in the section about car specific definition file.
Car specific rules are either located in the Resources\Garage\Rules\Cars folder in the program directory or in the Simulator Controller\Garage\Rules\Cars folder which is located in your user Documents folder. These files must implement the following naming scheme:
[Simulator].[Car].rules
with [Simulator] and [Car] substituted by the specific names.
These rules are loaded and activated, when you select a specific car in "Setup Workbench". In most cases, the car specific rules will alter the set of available car settings, but it is also possible to modify, add or remove rules for the problem analysis as described above.
Here is a much longer example for the "Porsche 992 GT3 Cup" which follows a very minimalistic approach, when it comes to car setup capabilities:
[?Initialize] => (Prove: removeSettings("Assetto Corsa Competizione", "Porsche 992 GT3 Cup",
			[Electronics.TC, Aero.Splitter.Front,
			 Spring.Rate.Front.Left, Spring.Rate.Front.Right,
			 Spring.Rate.Rear.Left, Spring.Rate.Rear.Right,
			 Bumpstop.Rate.Front.Left, Bumpstop.Rate.Front.Right,
			 Bumpstop.Rate.Rear.Left, Bumpstop.Rate.Rear.Right,
			 Bumpstop.Range.Front.Left, Bumpstop.Range.Front.Right,
			 Bumpstop.Range.Rear.Left, Bumpstop.Range.Rear.Right,
			 Damper.Compression.Slow.Front.Left, Damper.Compression.Slow.Front.Right,
			 Damper.Compression.Slow.Rear.Left, Damper.Compression.Slow.Rear.Right,
			 Damper.Compression.Fast.Front.Left, Damper.Compression.Fast.Front.Right,
			 Damper.Compression.Fast.Rear.Left, Damper.Compression.Fast.Rear.Right,
			 Damper.Rebound.Slow.Front.Left, Damper.Rebound.Slow.Front.Right,
			 Damper.Rebound.Slow.Rear.Left, Damper.Rebound.Slow.Rear.Right,
			 Damper.Rebound.Fast.Front.Left, Damper.Rebound.Fast.Front.Right,
			 Damper.Rebound.Fast.Rear.Left, Damper.Rebound.Fast.Rear.Right,
			 Differential.Preload, AntiRollBar.Rear]))
Beside the rules, which influence the way, the "Setup Workbench" analyses your handling problems, a so called definition file describe the car settings, their units and value ranges in more detail for the Setup Editor. These files are located in the Resources\Garage\Definitions\Cars folder in the program directory or in the Simulator Controller\Garage\Definitions\Cars folder which is located in your user Documents folder. These files must implement the following naming scheme:
[Simulator].[Car].ini
with [Simulator] and [Car] substituted by the specific names.
Here is an extract from the definition file for the "McLaren 720s GT3":
[General]
SteerLock=480
[Setup.Settings.Handler]
Brake.Balance=FloatHandler(47.0, 0.2, 1, 47.0, 68.0)
Brake.Duct.Front=ClicksHandler(0, 6)
Brake.Duct.Rear=ClicksHandler(0, 6)
Aero.Height.Front=IntegerHandler(50, 1, 50, 80)
Aero.Height.Rear=IntegerHandler(64, 1, 64, 105)
Aero.Wing.Rear=IntegerHandler(1, 1, 1, 8)
Geometry.Toe.Front.Left=FloatHandler(-0.48, 0.01, 2, -0.48, 0.44)
Geometry.Toe.Front.Right=FloatHandler(-0.48, 0.01, 2, -0.48, 0.44)
Geometry.Toe.Rear.Left=FloatHandler(-0.1, 0.01, 2, -0.1, 0.4)
Geometry.Toe.Rear.Right=FloatHandler(-0.1, 0.01, 2, -0.1, 0.4)
...
[Setup.Settings.Units.DE]
Brake.Balance=% Vorne
Aero.Height.Front=mm
Aero.Height.Rear=mm
Geometry.Toe.Front.Left=Grad
Geometry.Toe.Front.Right=Grad
Geometry.Toe.Rear.Left=Grad
Geometry.Toe.Rear.Right=Grad
...
[Setup.Settings.Units.EN]
Brake.Balance=% Front
Aero.Height.Front=mm
Aero.Height.Rear=mm
Geometry.Toe.Front.Left=Degrees
Geometry.Toe.Front.Right=Degrees
Geometry.Toe.Rear.Left=Degrees
Geometry.Toe.Rear.Right=Degrees
...
In the "[General]" section, values for SteerLock, SteerRatio, Wheelbase and TrackWidth can be supplied. They are used to initialize the settings in the issue analyzer and are also used for the telemetry analayzer.
The most important part is the "[Setup.Settings.Handler]" section. Here you specify a special handler for each setting, which manages this specific setting. If you don't supply a handler for an active setting of the given car, a default ClicksHandler with an unrestricted range will be active. You can also supply false as a handler, which means that this setting will be unavailable. The following handlers are available:
-
RawHandler(increment, minValue, maxValue)
This handler implements a range of numbers. The valid range of setting values goes from minValue to maxValue with each step defined be increment. The values will be used as such in the underlying simulator specific setup file.
-
ClicksHandler(minValue, maxValue)
Available values for this setting range from minValue to maxValue and are incremented by 1. minValue and maxValue must be both integers, where minValue is mapped to 0 in the underlying simulator specific setup file.
-
IntegerHandler(baseValue, increment, minValue, maxValue)
This handler implements a more complex range of natural numbers. All supplied values must be integers. The valid range of setting values goes from minValue to maxValue with each step defined be increment. baseValue will be used as the anchor, which corresponds to 0 in the underlying simulator specific setup file. Each step will correspond to an increment by 1 in the underlying raw value.
-
DecimalHandler(baseValue, increment, precision, minValue, maxValue)
Similar in behavior to the IntegerHandler, but uses floating point numbers. precision defines, how many places after the decimal point are considered and displayed. FloatHandler can be used as well, as it is synonym to DecimalHandler.
Example:
DecimalHandler(0, 0.1, 1, -3.5, 0.1)will create a continuous range of -35 to 1 in the simulator specific setup file, where -35 equals the display value -3.5 and 1 equals the display value 0.1.
-
EnumerationHandler(baseValue, increment, value1, value2, ...)
Using this handler, you can define a set of discrete values, which will then be mapped to a value in the underlying simulator specific setup file. baseValue will be used as the anchor, which corresponds to the first value1 and increment specify the change of the underlying value for each step in supplied list of discrete values.
Example:
Electronics.MGUK.Delivery=EnumerationHandler(0, 1, No Deploy, Build, Low, Balanced, High, Attack)defines six discrete values. No Deploy will be mapped to 0 and Attack will be mapped to 5.
-
ScriptHandler(scriptFileName, arg1, arg2, ...)
This is a very special handler in the sense, that you can write a script in the well-known Lua scripting language. This script has to define five global functions, that are called by the setup editor to handle a given setting. These functions are:
-
convert_to_display_value(value)
This function must accept a raw (2) value and convert it to the corresponding display (1) value.
-
convert_to_raw_value(value)
This function must accept a display (1) value and convert it to the corresponding raw (2) value.
-
format_value(value)
format_value is called with a display (1) value to prepare it for display in the user interface of the setup editor. An implementation may round a numerical value to a specific number of digits, for example.
-
increase_value(value)
increase_value takes a display value and returns the next value above the given value. If there are no more values available, the highest allowed value must be returned.
-
decrease_value(value)
decrease_value takes a display value and returns the next value below the given value. If there are no more values available, the lowest allowed value must be returned.
Notes:
(1) A display value is the value used in the setup editor user interface.
(2) A raw value is the value, that is stored in the setup file.
(3) All arguments, that have been passed to the ScriptHandler in the car definition file, are available in the global array Arguments.You can take a look at this implementation of a handler script for decimal values for an inspiration for your own handler script. Once you have created your script, you can use it in your car definition file like this:
Brake.Balance=ScriptHandler(%kResourcesDirectory%Scripts\DecimalSettingHandler.script, 0, 10, 52.0, 62.0, 0.5, 1)As you can see, the first argument is the full path to the script file (using the sample handler here), followed by a number of arguments to the script, which are 0, 10, 52.0, 62.0, 0.5, 1 in this case.
-
The sections "[Setup.Settings.Units.DE]" and "[Setup.Settings.Units.EN]" and so on allow you to supply language specific unit labels for all the settings. If an entry is missing, "Clicks" (or a corresponding translation) will be used.
This chapter is for experts only, who want to introduce settings for a modded car to the "Setup Workbench". You can safely skip this chapter, if this does not apply to you.
The default set of characteristics and settings for the "Setup "Workbench" is defined in the file Resources\Garage\Setup Workbench.ini in the program folder. Make yourself familiar with the default set before you move ahead.
Now you can alter the set of settings handled by the "Setup Workbench". You can remove settings or you can add new ones by following the steps below:
-
Introduce a setting by supplying the following definitions:
  [Workbench.Settings]
  Aero=Splitter.Front; Wing.Front; Wing.Rear; Height: Front, Rear; Diffusor.Height
Explanation: The default settings definition already mentions "Splitter.Front; Wing.Front; Wing.Rear; Height: Front, Rear" for the "Aero" category. We will add "Diffusor.Height" here.
-
Optionally you can also introduce language specific labels for the user interface using:
[Workbench.Settings.Labels.DE] Aero.Diffusor.Height=Diffusor Höhe [Workbench.Settings.Labels.EN] Aero.Diffusor.Height=Diffusor Height -
Once you have defined the new setting, you must define your own rules as described in How it works, so that "Setup Workbench" knows, when to recommend a cerresponding setup modification. Example:
  [?Initialize] => (Prove: addSettings("Assetto Corsa", "My race car", [Aero.Diffusor.Height]))

  [?Speed.Corner.Fast.Correction != 0] =>
  	(Prove: changeSetting(Aero.Diffusor.Height, -1, ?Speed.Corner.Fast.Correction))
Note: Beside given these definitions for a specific car, you can also use similar definitions when introducing a complete new simulator as described below. And, using the same approach, you can modify the characteristics handled by "Simulator Workbench" for a given car or for a complete simulator. But to do this, you must have an extensive understanding of the rules set, which derives setup recommendations on behalf of reported handlind problems.
If you want the new setting to be available in the Setup Editor as well, you will have to define the mapping for the setting.
-
Example definition for Assetto Corsa:
  [Setup.Settings]
  Aero.Diffusor.Height=DIFFUSOR_HEIGHT
Explanation: This simply defines the field in the setup file format of the given car mod for Assetto Corsa. The file formats for the different simulator can be found below.
After you have defined the setting itself, define your own handler for this setting:
  [Setup.Settings.Handler]
  Aero.Diffusor.Height=ClicksHandler(1, 4)
Introducing handling characteristics, which are used to describe the issues you have with the car, follows a very similar pattern. Define the characteristics you want to add in the simulator or car configuration file by adding a section like
[Workbench.Characteristics]
Battery=Depletion: Low, High
And you can introduce language specific labels here as well:
[Workbench.Characteristics.Labels.DE]
Battery=Batterie
Depletion=Nutzung
Low=Niedrig
High=Hoch
Battery.Depletion.Low=Batterie Nutzung zu Niedrig
Battery.Depletion.High=Batterie Nutzung zu Hoch

[Workbench.Characteristics.Labels.EN]
Battery=Battery
Depletion=Usage
Low=Low
High=High
Battery.Depletion.Low=Battery Usage to Low
Battery.Depletion.High=Battery Usage to High
Most of the concepts discussed above can be seen in action in the "Tatuus FA01" specification (created by @mirko_lesko), a car of the Assetto Corsa simulation.
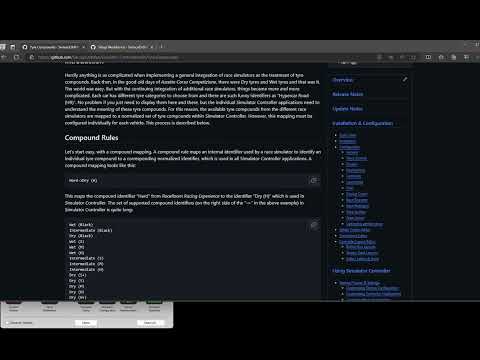
I also recommend to take a look at this video, which covers the complete process step by step:
Last, but not least, if you are want to do all this for cars of Assetto Corsa, I can recommend the brilliant tool of Maurice Bish (@bishman), which handles all the stuff described above automatically for the most part. The tool is free and can be downloaded from GitHub, where you can also find important documentation.
Most of the stuff we talked about so far is independent of a specific simulator, since all of them store the setups more or less in the same way - as numbers. The file format, though, is very different. As you have seen above, the setups are stored as a JSON file in Assetto Corsa Competizione, whereas INI files are used by Assetto Corsa. Therefore, let's take a look into the simulator specific configuration.
Similar to cars, each simulator has a definition file which is located in the Resources\Garage\Definitions folder in the program directory. You can add your own, as mentioned above, by adding them to Simulator Controller\Garage\Definitions folder in your local Documents folder. A rule file for a given simulator is also available, which is located (I think you can guess it) in the Resources\Garage\Rules folder in the program directory. You can also add your own here by adding them to Simulator Controller\Garage\Rules folder in your local Documents folder.
"Setup Workbench" scans both directories at startup and compiles the list of available simulators. Let's now take a look at the simulator specific configuration.
The access paths for the JSON-based setup files of Assetto Corsa Competizione are stored in the Assetto Corsa Competizione.ini file. Here is excerpt from this file:
[Simulator]
Simulator=Assetto Corsa Competizione
Analyzer=GenericTelemetryAnalyzer
Cars=true
Tracks=*
[Setup]
Editor=ACCSetupEditor
Comparator=ACCSetupComparator
Type=JSON
[Setup.Settings]
Electronics.TC=basicSetup.electronics.tC1
Electronics.ABS=basicSetup.electronics.abs
Brake.Pressure=advancedSetup.mechanicalBalance.brakeTorque
Brake.Balance=advancedSetup.mechanicalBalance.brakeBias
Brake.Duct.Front=advancedSetup.aeroBalance.brakeDuct[1]
Brake.Duct.Rear=advancedSetup.aeroBalance.brakeDuct[2]
...
As you can see, the approach is quite simple, since the structure of the JSON-based setup file is very similar to the internal storage format, which is used by "Setup Workbench".
Asseto Corsa follows a similar approach but uses a different file format (INI) for its setup files. Here is an excerpt:
[Simulator]
Simulator=Assetto Corsa
Analyzer=GenericTelemetryAnalyzer
Cars=true
Tracks=*
[Setup]
Editor=ACSetupEditor
Comparator=ACSetupComparator
Type=INI
[Setup.Settings]
Electronics.TC=TRACTION_CONTROL
Electronics.ABS=ABS
Brake.Pressure=BRAKE_POWER_MULT
Brake.Balance=FRONT_BIAS
Tyre.Pressure.Front.Left=PRESSURE_LF
Tyre.Pressure.Front.Right=PRESSURE_RF
Tyre.Pressure.Rear.Left=PRESSURE_LR
Tyre.Pressure.Rear.Right=PRESSURE_RR
Aero.Height.Front=ROD_LENGTH_LF
Aero.Height.Rear=ROD_LENGTH_LR
Aero.Wing.Front=WING_1
Aero.Wing.Rear=WING_2
...
- Only Assetto Corsa, Assetto Corsa Competizione, Le Mans Ultimate and rFactor 2 are supported at the moment, when it comes to editing, comparing and saving setup files. For rFactor 2 only a few cars are supported in the standard distribution of Simulator Controller, but you can define your own cars as described above. Other simulators might follow with future releases, but a first investigation has shown that setup file handling and - even more important - setup file format is rather cryptic and undocumented in other simulators.
- The implementations for Assetto Corsa Competizione provides a generic car model and detailed car specifications for all currently available cars. More cars will be added when additional DLCs become availabble.
- The implementation for Assetto Corsa currently provides a generic car model and many detailed car models at the moment. More detailed car models will be added over time. If you don't find your favorite car, please feel free to implement the car definition and rules files (takes a couple of minutes, see the description in the previous section). I will be happy to add your car to the package as a community contribution.
- The implementation for Le Mans Ultimate currently provides a generic car model and detailed car models for all cars from the simulator including all current extensions. Working with Le Mans Ultimate setup is a bit different than for the other simulators, since setups are not stored car specific, but only track specific. So be sure to include the car model name in the name of the setup file to help identifying the correct setup later on.
- As said, not many cars are available for rFactor 2 but you may define your own car meta data. Once done and tested, I will be happy to add your car to the package as a community contribution. The comments for Le Mans Ultimate apply here as well.
- Last but not least, specifications for specific car models are missing completely for all other simulators, only a generic car is supported here, although all cars you have used so far for the given simulator, will be available in the car selection menu. Nevertheless, only those settings, which are actually available in a given simulator, are used by "Setup Workbench".